GUI Usage
On this page we will provide options to interact with your data on Kopah via Graphical User Interfaces (GUIs).
Watch our Getting Started with Kopah video for a quick overview of the service before diving into GUI tools.
Globus
As of Spring 2025, we’re excited to announce that Globus has been added to Hyak klone and Kopah S3. Globus makes it easy to transfer large datasets reliably and securely between systems, whether across campus or around the world. With features like automated transfers, fault tolerance, and a simple web interface, it’s a powerful tool for streamlining data movement in research workflows.
Globus public sharing is available with Kopah S3 storage, making it a dynamic compliment for your research storage portfolio if you anticipate requiring regular sharing and collaboration.
To use Globus with Kopah S3 storage, at least one username must be mapped to the storage account. This mapping connects your Globus identity to the storage system and must be set up by our staff. Contact us to get started—it's a quick, one-time step.
Request Globus mapping by emailing help@uw.edu with "Kopah + Globus" in the subject line.
Kopah storage accounts can be requested using our Intake Form and Cost Calculator. Kopah 1-month trial accounts are available - Try Kopah.
Set Up
Logging into Globus is straight forward:
- Go to globus.org and "LOG IN" with University of Washington. Sign in will include Duo 2-Factor Authentication.
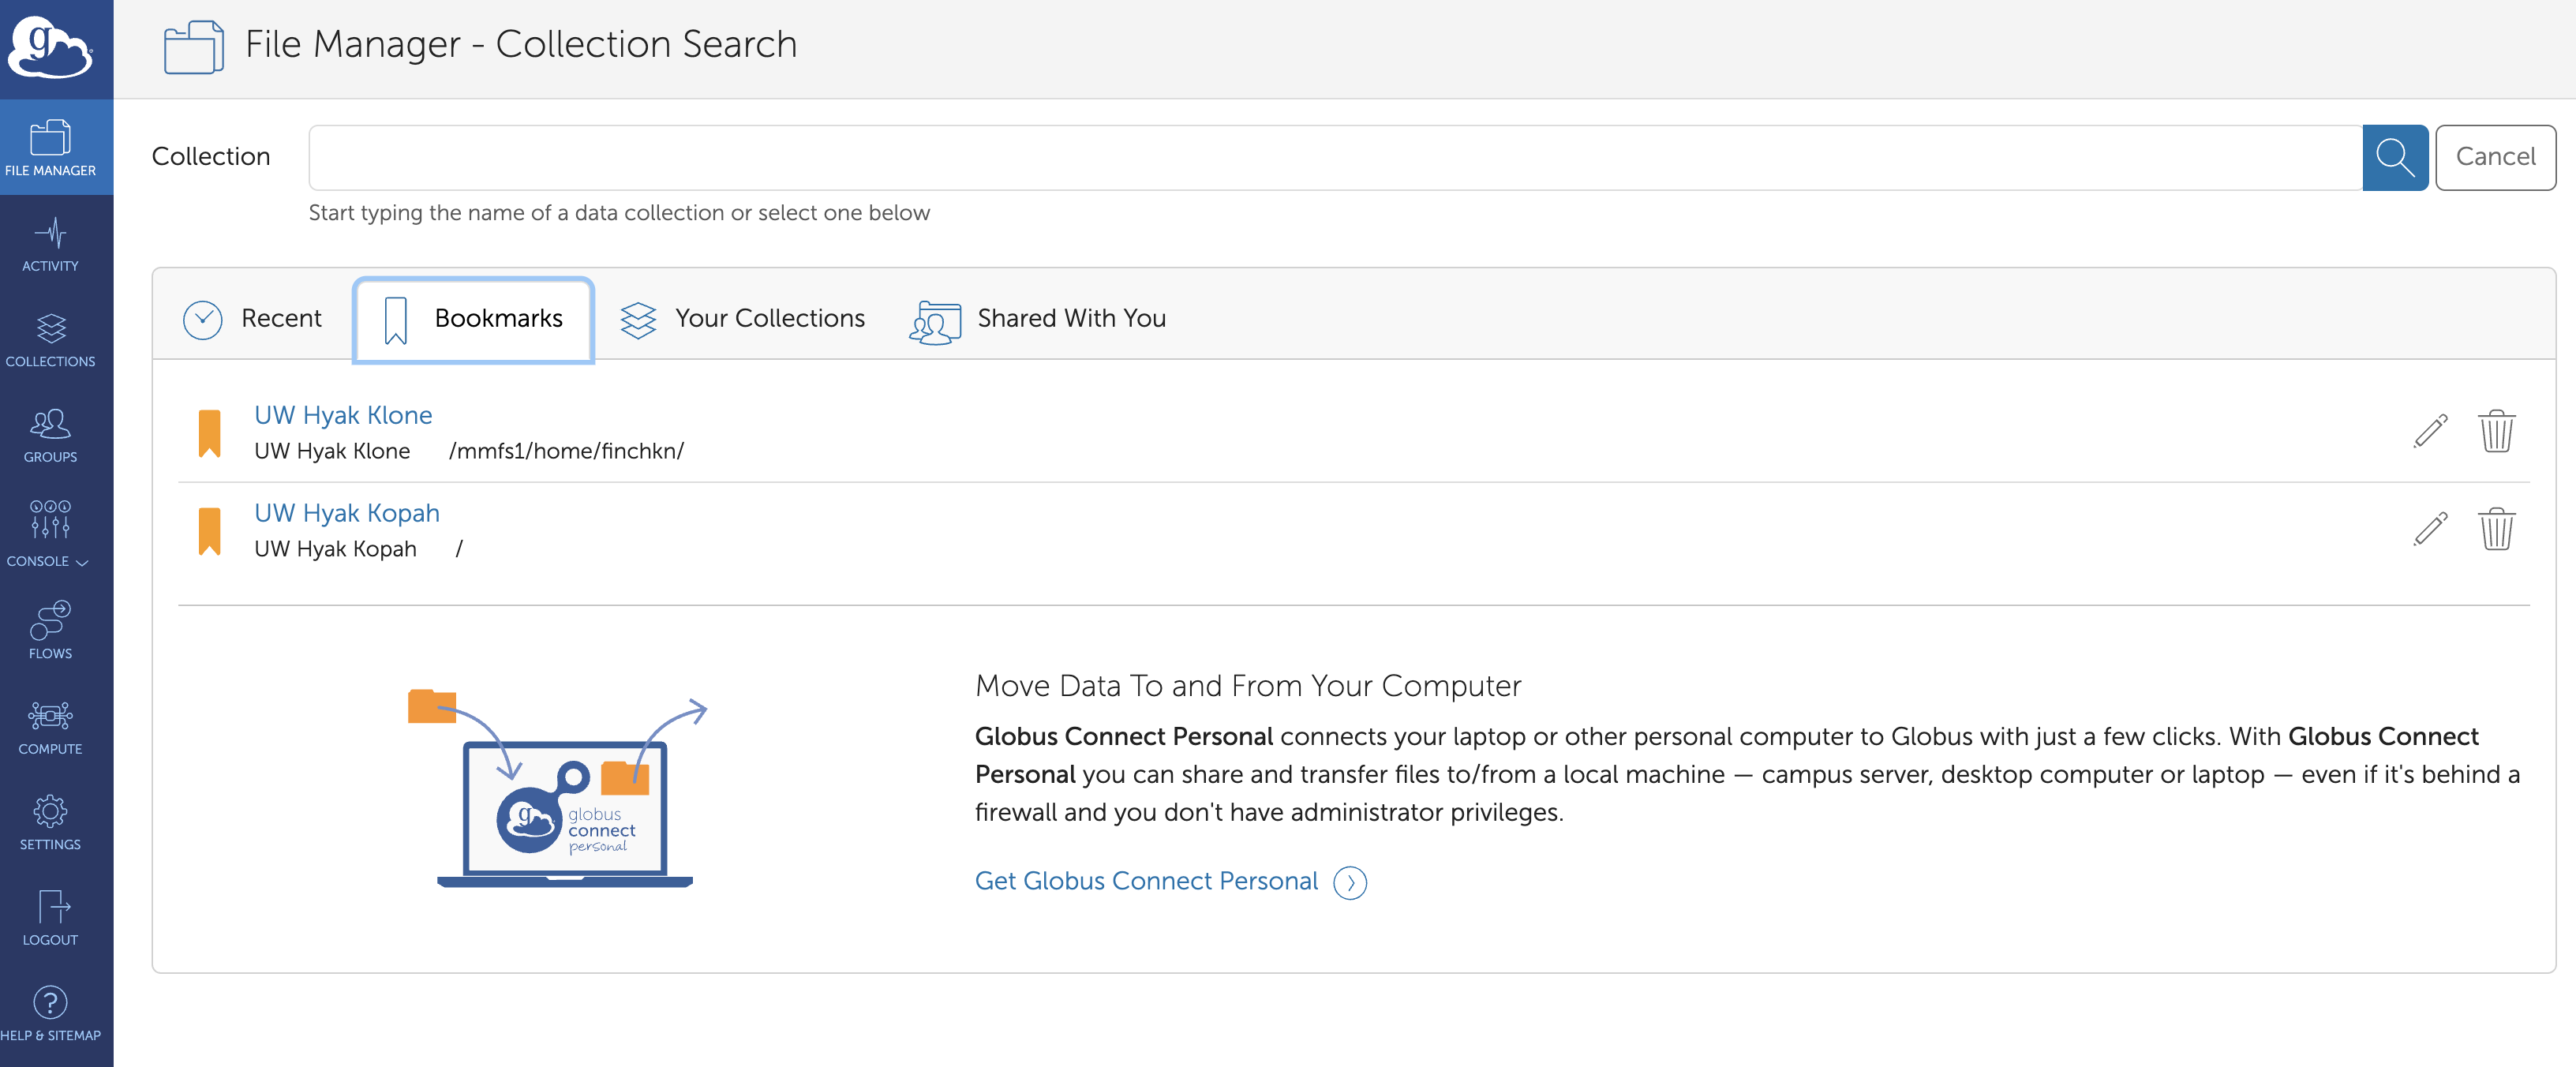
- Using the File Manager - Collection Search tab look for "UW Hyak Kopah".
- Once you click on the "UW Hyak Kopah" collection, be sure to Bookmark the collection so that it appears in the Bookmarks tab for future searches and operations as shown below.
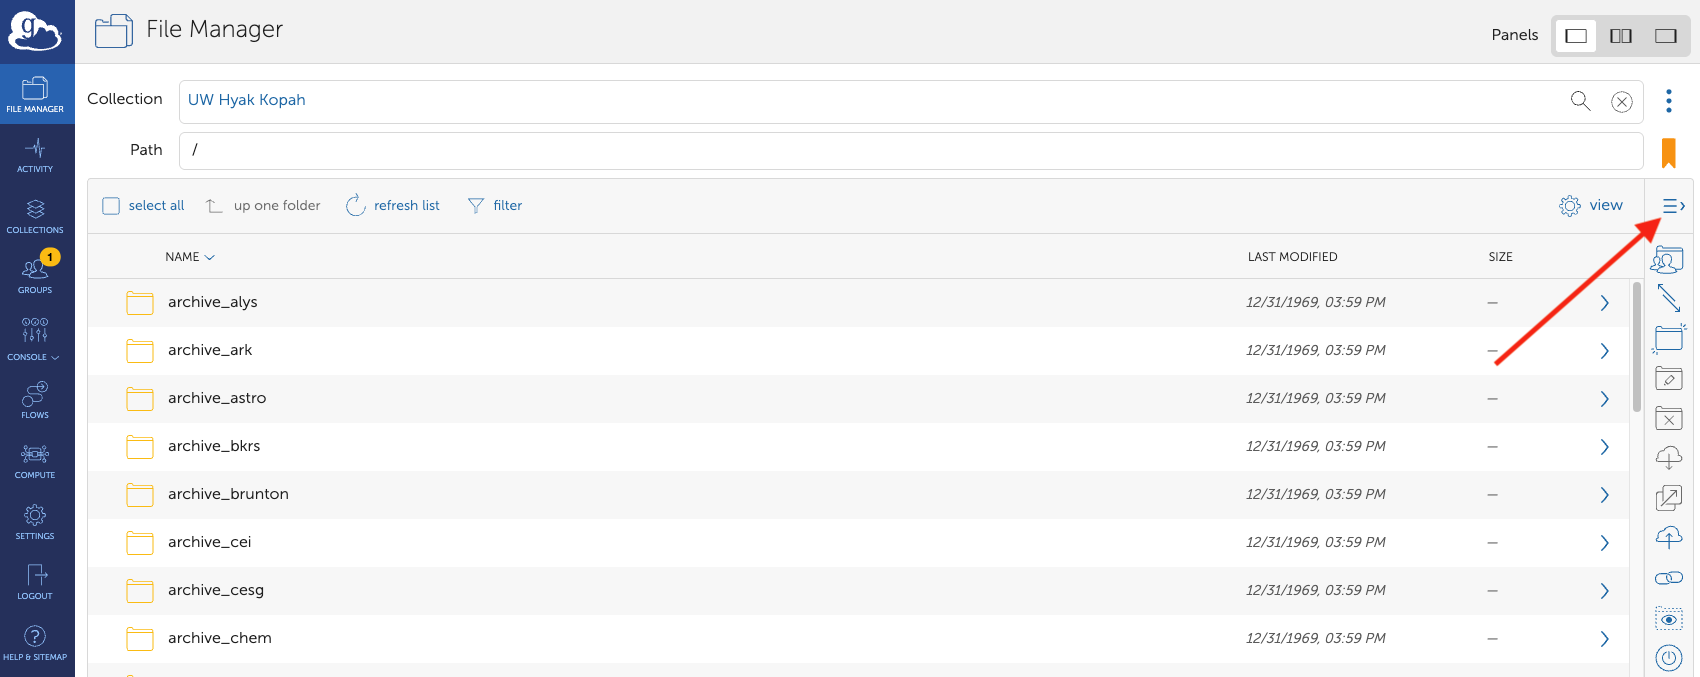
- Once connected, you will see your KopahS3 buckets created while using your Kopah account. The three-lines menu can be revealed to show helpful features, expanding it shows the function descriptions.
Transfer from Local
Setting up Globus Connect Personal on your local computer lets you create a personal endpoint, making it easy to transfer files between your computer and other Globus collections—including our cluster—using a simple, secure interface.
- Install Globus Connect Personal for your operating system.
HTTPS uploads and downloads are limited to 10 GB per file. Files under 10 GB can be transferred by dragging and dropping or by using the upload/download buttons in Globus. For larger uploads, use Globus Connect Personal.
Video guide from the Globus Team.
Note: the Endpoints Menu Tool appears to be deprecated and now "Endpoint" and "Collection" are synonymous. Your personal endpoint can be found by searching Collections.
- While configuring your Globus Connect Personal endpoint, be sure to select a unique name for your device (e.g., User-MacBook-Pro or Lab-Desktop), you will use this name again when you start transferring data.
- Once you have Globus Connect Personal installed and configured, you can start transferring data between your personal device and Kopah S3. There are many ways to use Globus. Below, we provide some examples:
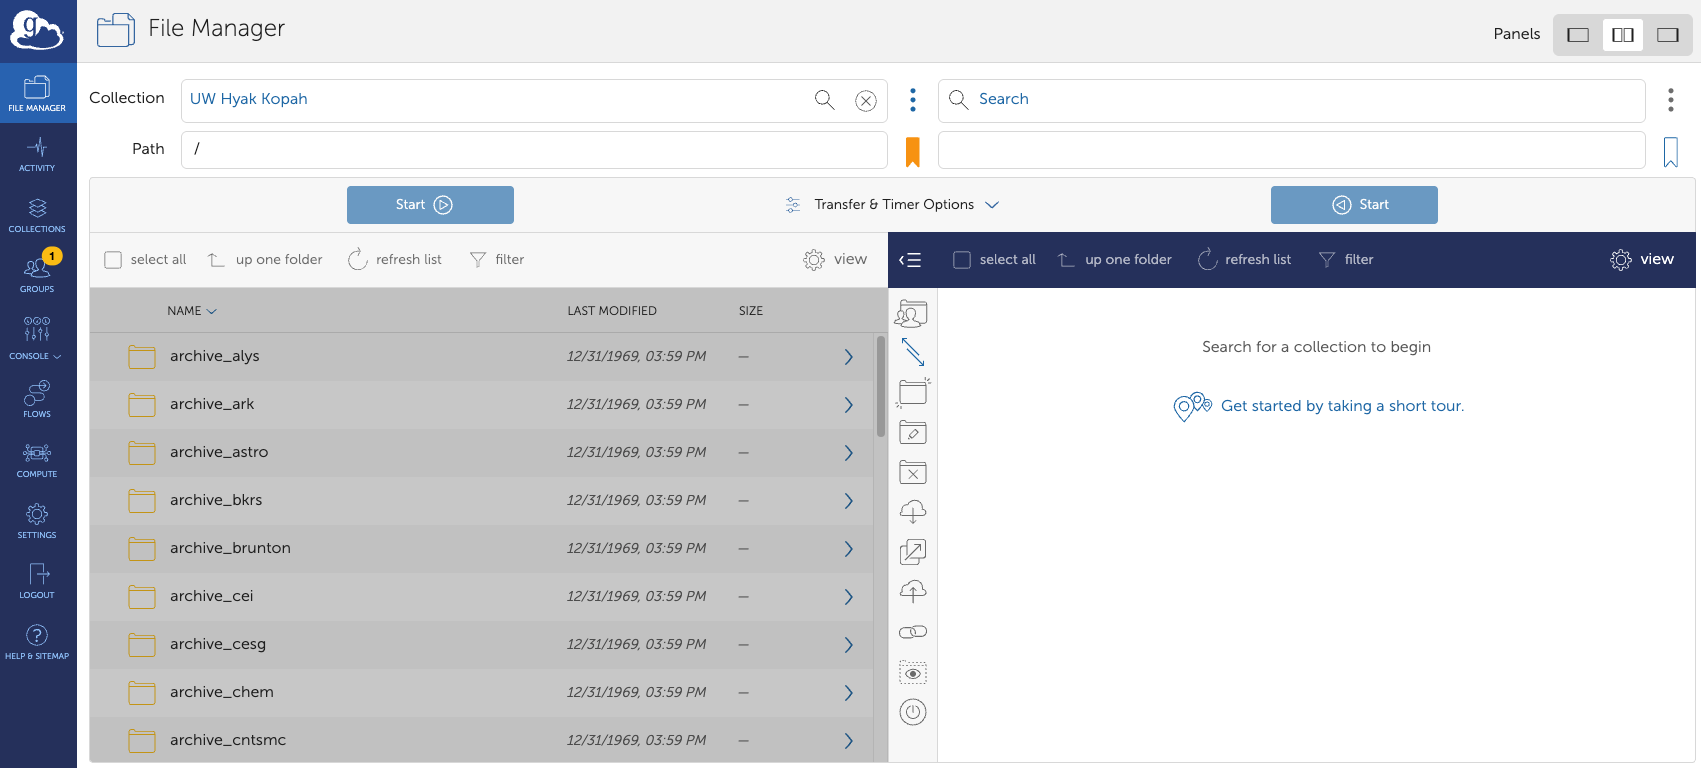
Globus has a two-pane view option which can allow you to see two collections in the same window and perform transfers between them. With UW Hyak Kopah in one pane, click search in the other to select a different collection.
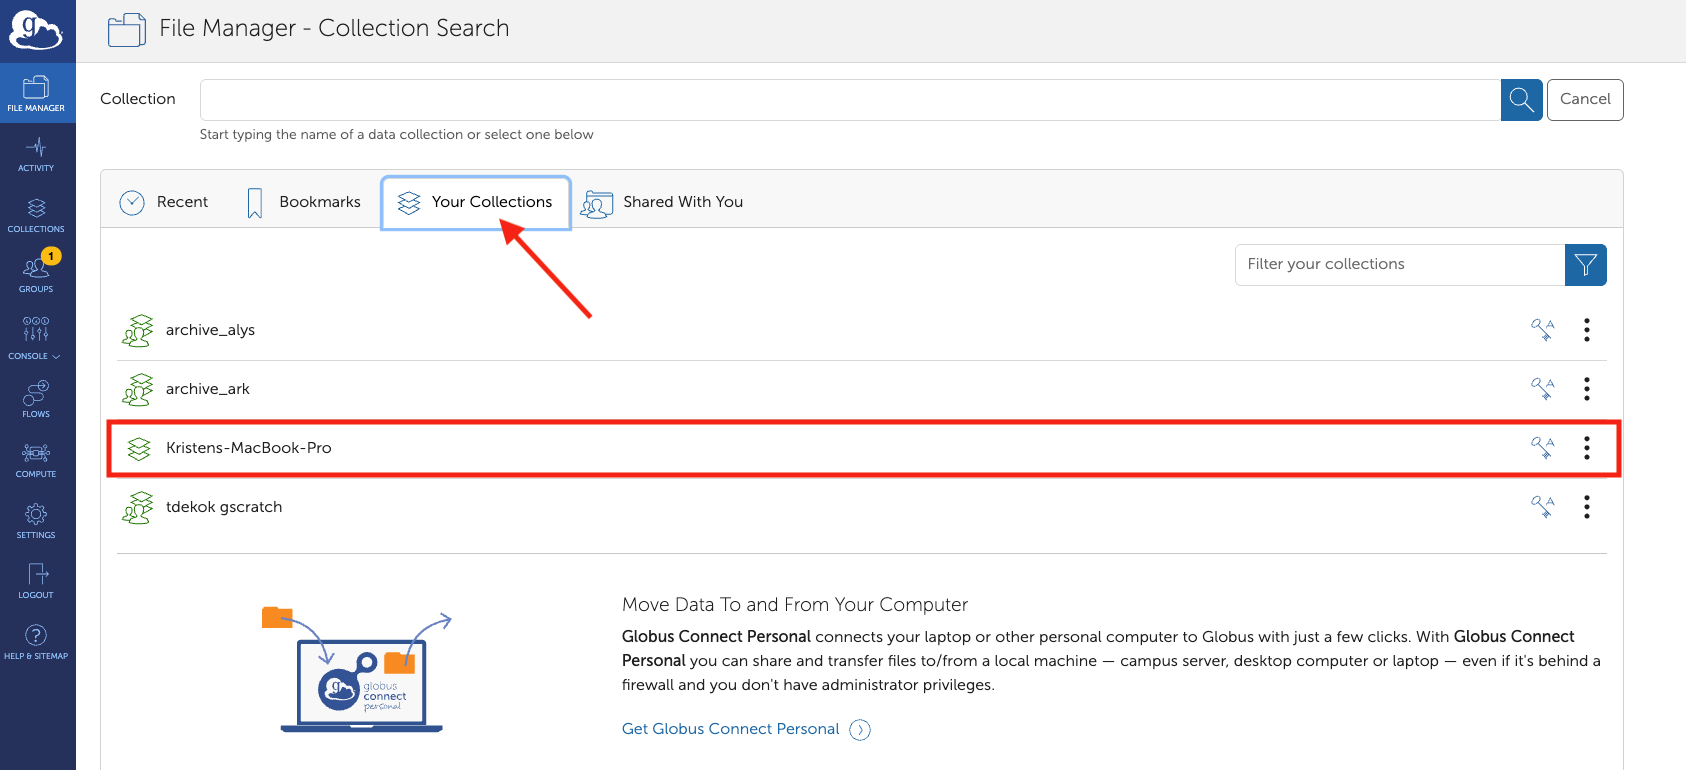
Using the File Manager - Collection Search and the Collections tab find the personal endpoint you configured for yourself.
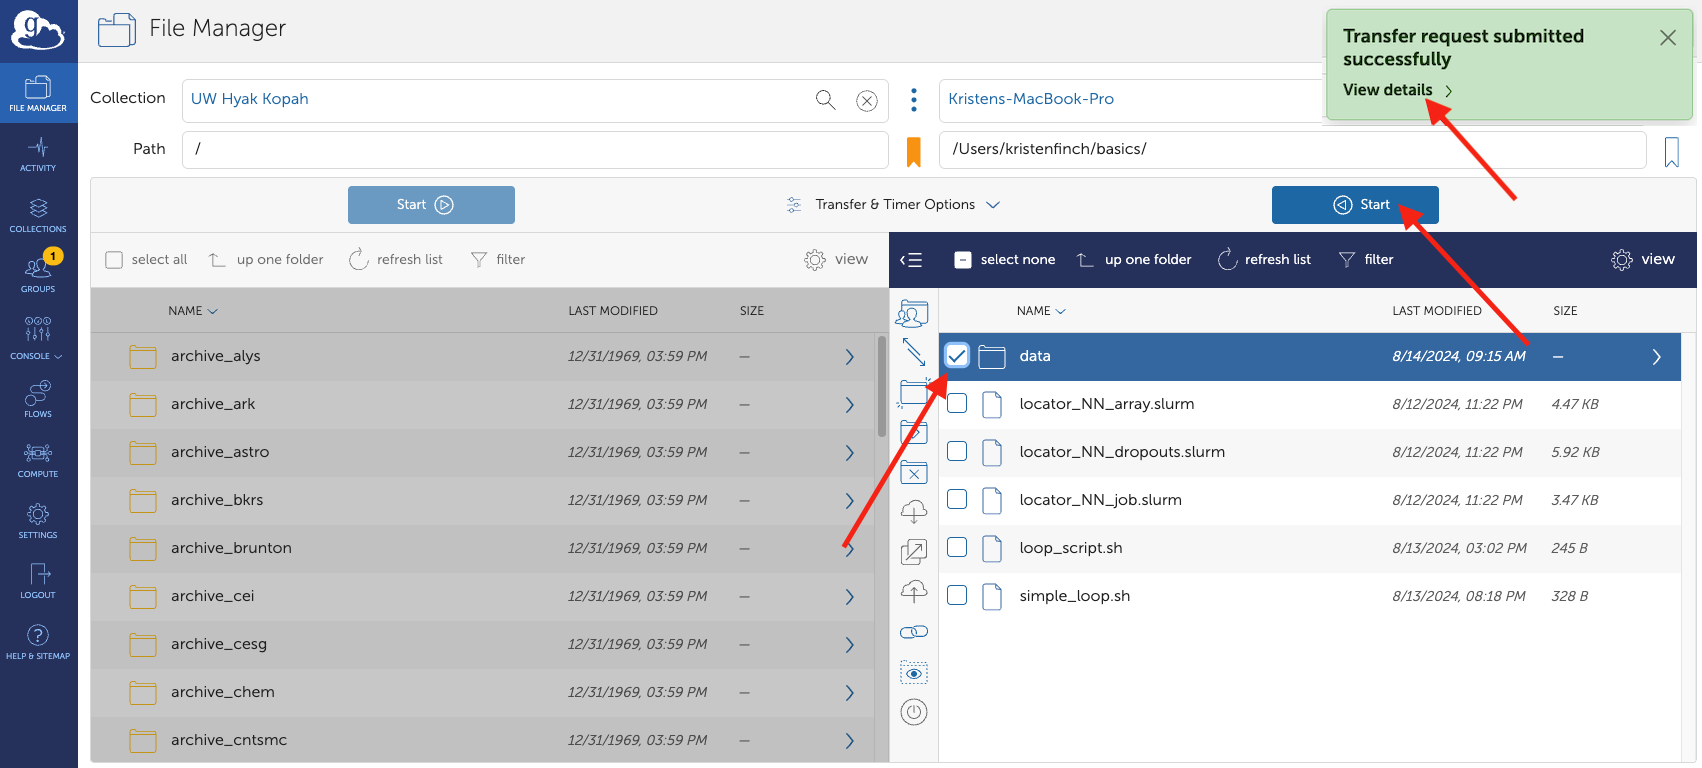
Once your Globus Connect Personal collection is loaded on the second pane, you can navigate to the files you wish to transfer. Select files to transfer with the check box and press start. Once a transfer has started, a green box will show that your transfer request has been successfully submitted and you have the option to "View details." For small transfers, speeds are fast and results are complete quickly; you can "refresh list" on the receiving collection to see newly transferred files. Larger transfers can occur unsupervised and with minimal interruptions. Globus will send you an email when your transfer is completed.
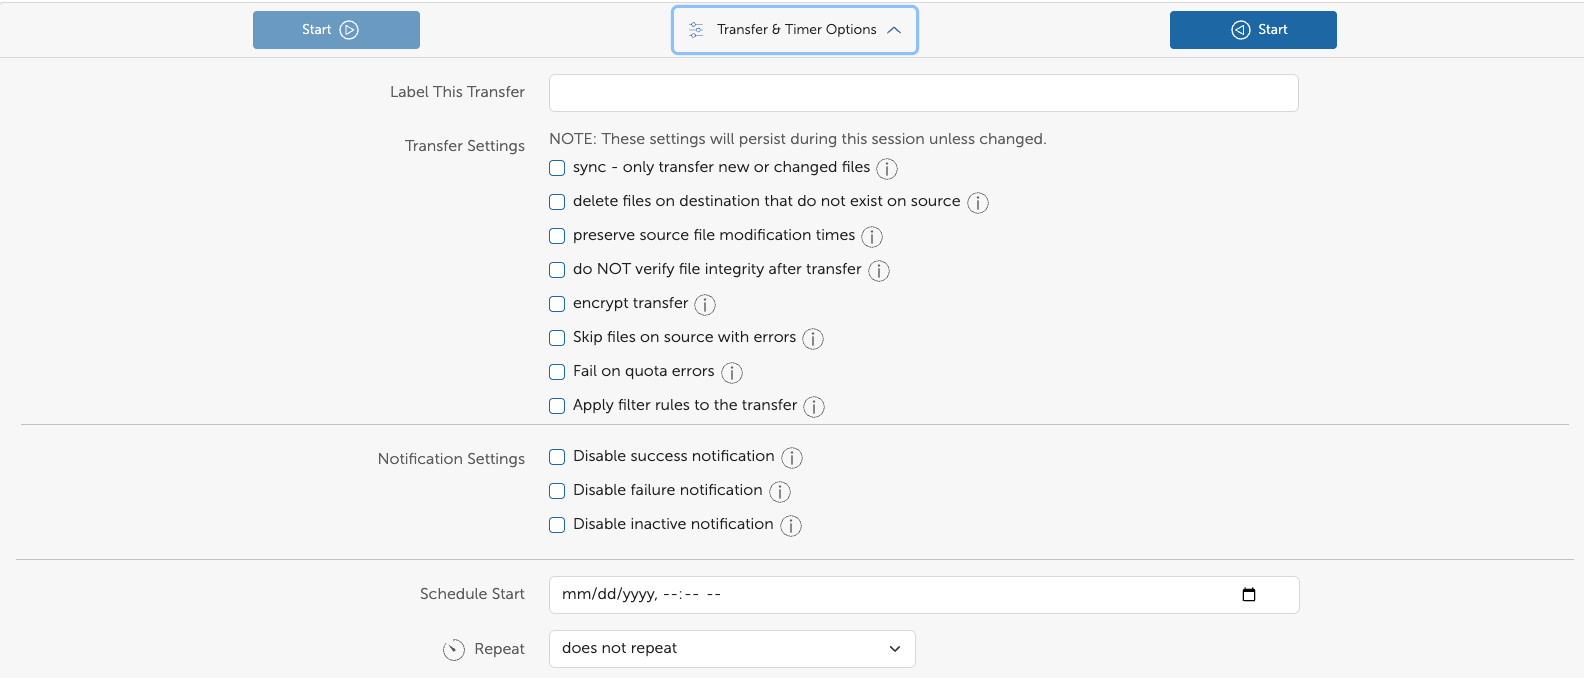
Globus offers many options for transferring data, shown below. Options include scheduled and repeated transfers.
Transfer to and from Klone /gscratch
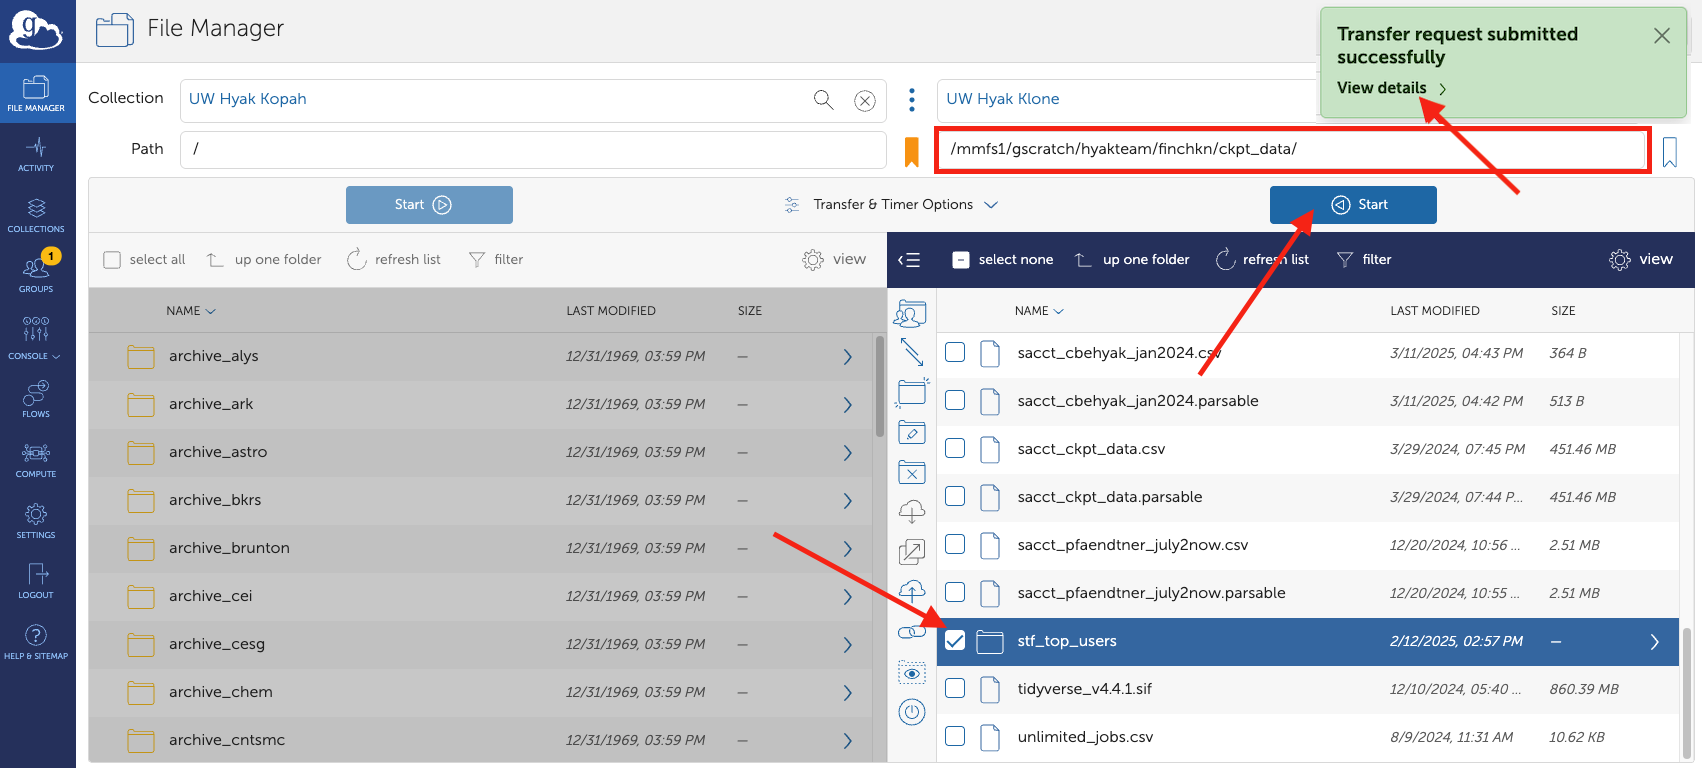
As above, you can set UW Hyak Klone as the second Collection with the two-pane view to request transfers between your Kopah S3 buckets and Hyak klone. Using the File Manager - Collection Search search for "UW Hyak Klone" and select it. Navigate to a destination on klone that you have permissions to view. Select the data to transfer with the checkbox. Click the Start button to request the transfer. Globus will send you an email when your transfer is completed.
Group and Sharing
Group sharing in Globus lets you share data with collaborators by granting access to specific files or directories within a shared collection. You control who can view, download, and upload data to your Kopah buckets by managing group membership, all without needing to move or duplicate files.
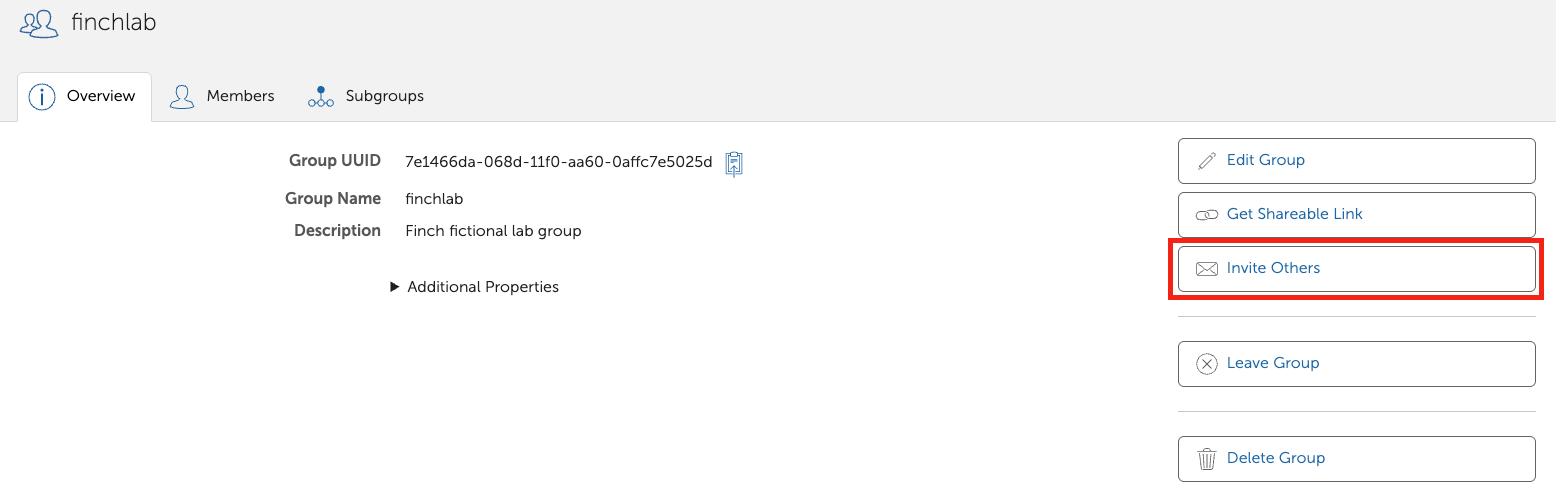
- User the Groups tab and "Create new group" in the upper right corner of the Groups Tool. Customize you group and invite members of your lab to the group using their UWNetIDs.
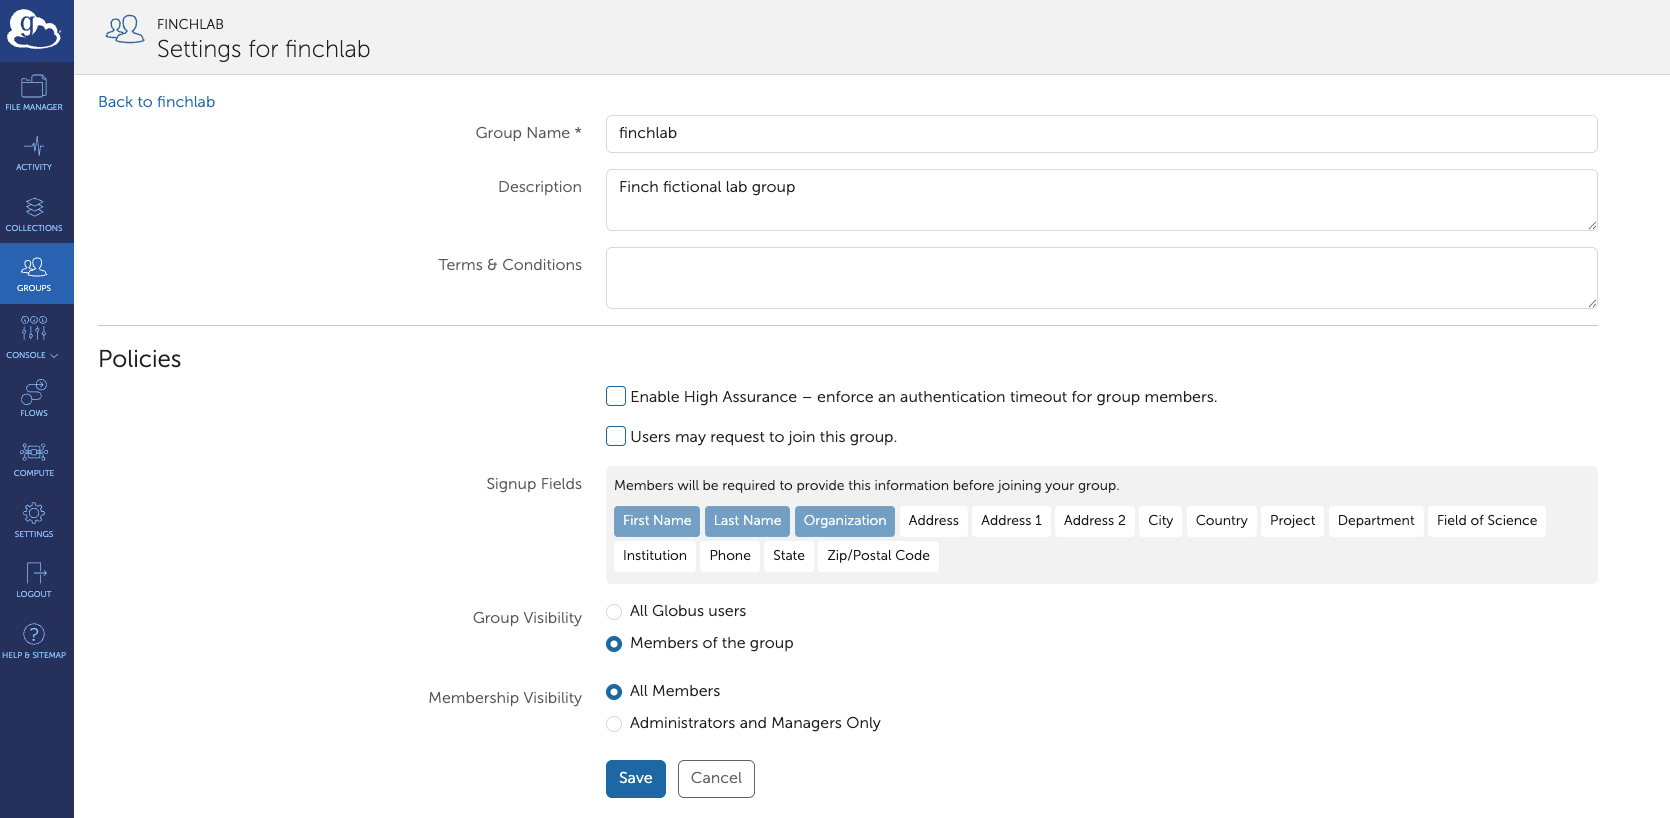
You will not be able to share anything with them until they have accepted the invitation, but after they are invited, you can share specific buckets with the entire group.
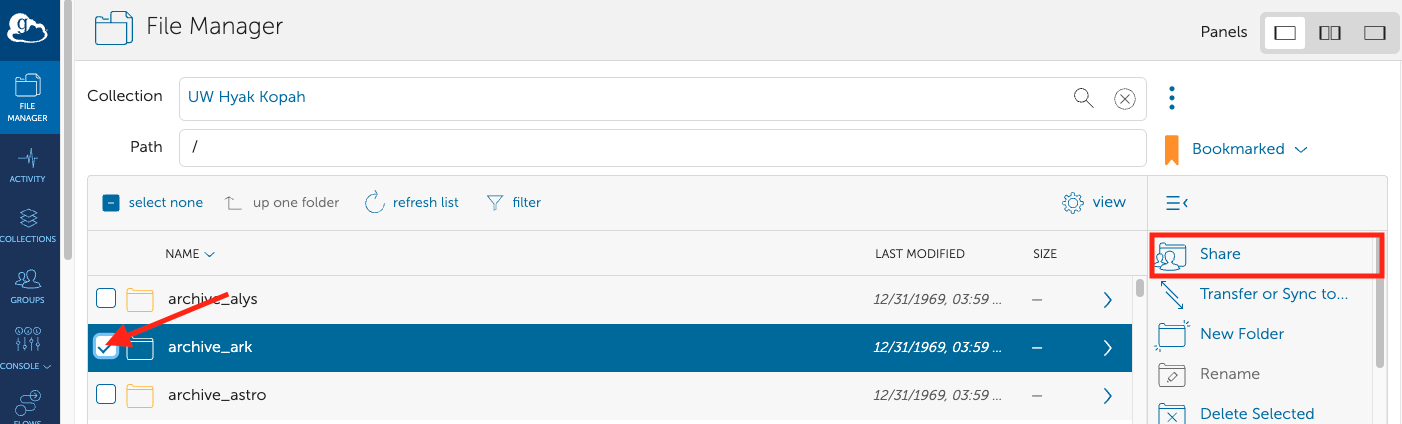
- Select a bucket to share. After that you will need to make it a guest collection. In the Guest Collections interface choose " + Add Guest Collection." This requires you to choose a display name for the collection.
In Globus, each bucket must be turned into its own collection to enable sharing. To simplify access and make group sharing more efficient, we recommend creating buckets at a higher organizational level—such as the project level—so that more content can be shared at once without needing multiple collections.
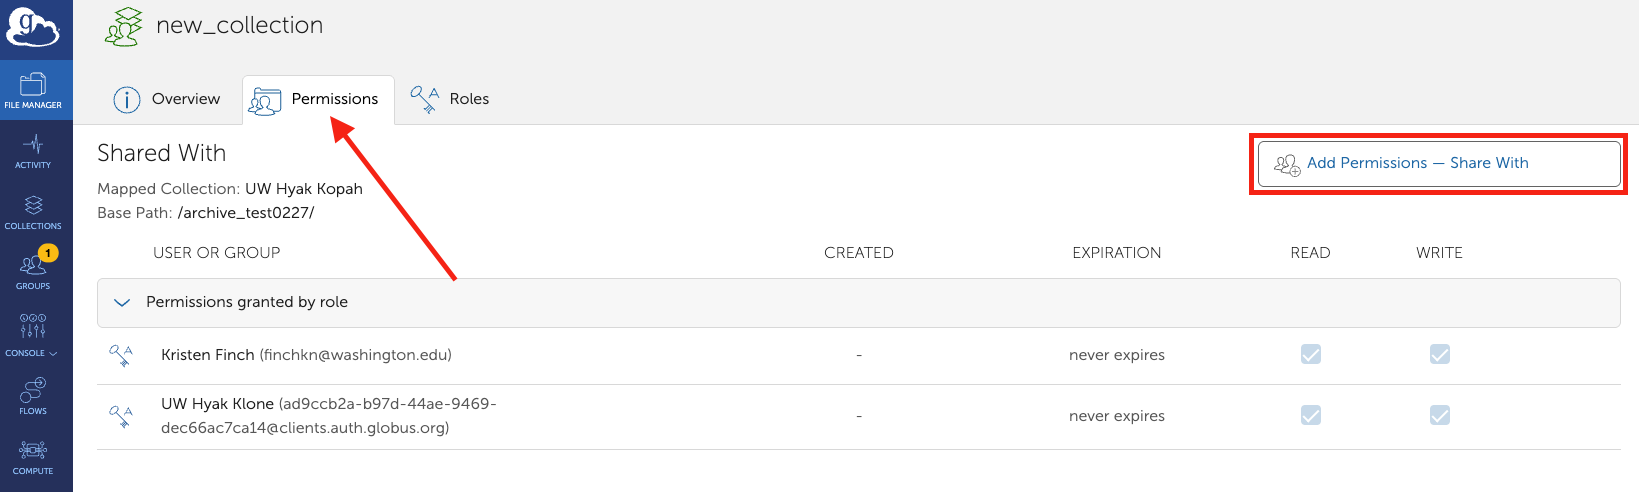
- Once your collection is ready, you will set up sharing in the Permissions tab by selecting "+ Add Permissions - Share With."
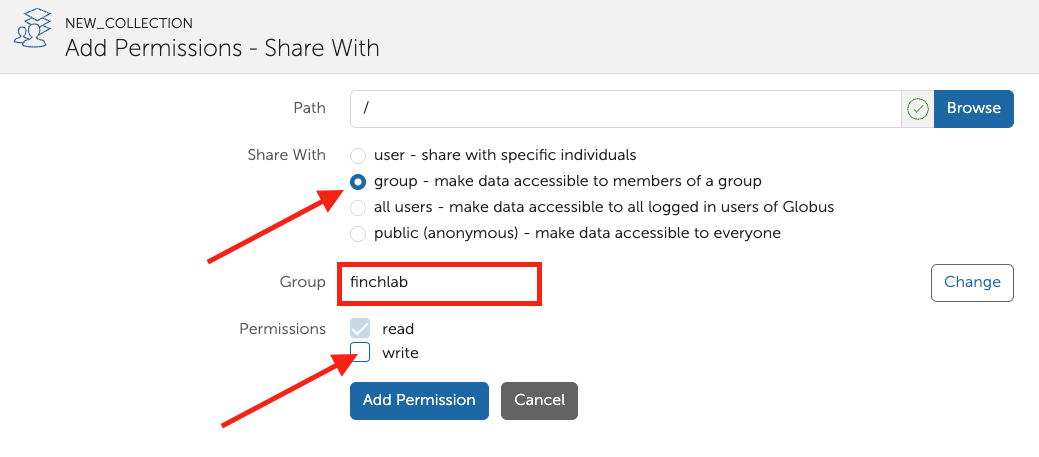
- In the Add Permissions - Shared With interface, choose "Share With" group and use the "Select Group" button to share with your group. At this point, you can set up read only or read/write permissions. Setting up write permissions means that others can edit content in buckets and add new content. They can also delete content from buckets. This permission can be added later. Using this same tool, you can share collections with specific users rather than with a group. Click "Add Permission" to confirm settings.
Globus is a great tools and we will continue to bring you tips and tricks for using it.
Learn More:
- Please explore Globus' extensive user documentation
- Including video tutorials.
- We found Introduction to Globus for Researchers and New Users informative.
Cyberduck
Cyberduck is an open-source client for managing and transferring files to various cloud storage services and protocols, including FTP, SFTP, and S3. It offers a simple, intuitive interface that allows users to easily upload, download, and organize their files. Cyberduck is available for both Windows and macOS, making it a versatile tool for seamless file management across different platforms.
To get started with Cyberduck, install the software from the developer's website on your local computer.
Steps for connecting to Kopah:
-
For ease of use, a pre-configured connection profile for Kopah is available. Click this link to Download the profile. After the file is finished downloading, change the filename to
kopah.cyberduckprofile. You may decide to move this file from your Downloads directory and store it in a more permanent location. Once the file is in its final location, double-click it within a file explorer it will open in Cyberduck. -
Open a new Cyberduck window and locate the Open Connection Icon.

-
You should see your profile to connect to Kopah S3 showing in the drop-down box. Enter you Access Key and Secret Key, which can be found in your Home directory on
klone. When you requested your account the Kopah team deposited your Kopah keys, in your Home directory.

- Once that is complete, Kopah S3 will appear on your Cyberduck bookmarks or server list. Connect by double clicking on the Kopah S3 bookmark.

- You can now interact with Kopah using the GUI! Buckets can be created by right clicking and selecting New Folder.... Objects can be added to bucket by dragging and dropping files and directories into the buckets.

In the example above there are two buckets, bucket1 and bucket2, each with one file.