Jupyter Notebooks
Jupyter Notebooks provide an interactive computing environment that combines code execution, rich text, mathematics, plots, and rich media. On Hyak, you can run Jupyter in three different ways, each with their own advantages.
Choosing Your Jupyter Setup Method
1. Open OnDemand (Easiest)
This method provides the simplest way to run Jupyter on Hyak:
- No Configuration: No need to set up SSH tunnels or manage job scripts
- Web Interface: Access Jupyter directly through your browser
- User-Friendly: Intuitive interface for managing sessions and resources
2. Jupyter via Slurm Job
This method uses containers to run Jupyter, providing several advantages:
- Isolation: Each session runs in its own container, preventing conflicts between different projects
- Simplicity: Prewritten script requires no manual setup
- Portability: Easy to share and reproduce environments across different systems
3. Manual Jupyter Setup with Miniconda
This traditional approach requires more manual setup but offers some benefits:
- Flexibility: Can modify environments on-the-fly without rebuilding containers
- Familiarity: Mirrors local workflows with conda or pip
- Debugging: Easier to inspect environment issues or adjust runtime settings directly
For most users, we recommend using Open OnDemand as it provides the simplest and most user-friendly experience. If you need more control over your environment, the Slurm Job method with containers is a good alternative. The manual Miniconda approach is best suited for users who need fine-grained control and quick iteration on their Python environments or are more familiar with the toolchain.
Jupyter via Slurm Job
This section describes how to run Jupyter Lab/Notebook as a Slurm job, which provides an automated way to set up your Jupyter sessions.
Pre-requisites
This method will require a container to get started, look for copies at /sw/ondemand/containers/jupyter/sifs, select a container from the quay.io registry, or build your own. For more information, read about containers on Hyak.
Step 1: Prepare Slurm Job File
We will launch Jupyter as a job using sbatch. Download our Slurm job file from this hyperlink which has been adapted for klone. The command below will download the file to your current directory.
wget https://hyak.uw.edu/files/jupyter-server.job
Remember to replace the word UWNetID in the paths below with YOUR username/UWNetID.
You will need to modify a few environment variables in jupyter-server.job:
- The
JUPYTER_CWDpath is your working directory. The default is/gscratch/scrubbed/UWNetID- You must change this line for this to work. We recommend setting this to the directory where you are storing your data for your intended project. - Set your
JUPYTER_SIFvariable to the name of your container file. - (Optional) Adjust the Slurm directives (
--partition,--time,--mem, etc.) to match your resource requirements.
If you are already on an allocated compute node, you can run the script directly without using sbatch:
./jupyter-server.job
This will start the Jupyter server immediately on your current node.
Review the highlighted sections of jupyter-server.job below and edit your version to fit your needs:
#!/bin/bash

#SBATCH --job-name=jupyter-server
#SBATCH --account=uwit      # update this line - use hyakalloc to find accounts you can use
#SBATCH --partition=ckpt    # update this line - use hyakalloc to find partitions you can use

#SBATCH --time=01:00:00
#SBATCH --nodes=1
#SBATCH --ntasks=1
#SBATCH --gpus=1
#SBATCH --mem=1G

#SBATCH --signal=USR2
#SBATCH --output=%x_%j.out

JUPYTER_CWD="/gscratch/scrubbed/UWNetID" # UPDATE THIS LINE
JUPYTER_SIF="datascience-notebook_latest.sif" # update this line
Step 2: Start the Jupyter Server
Submit the job with sbatch:
sbatch jupyter-server.job
Submitted batch job 12345678
Monitor the job with squeue:
squeue -u UWNetID
             JOBID PARTITION           NAME    USER ST       TIME  NODES NODELIST(REASON)
          12345678      ckpt jupyter-server UWNetID  R       3:15      1    n3286
Slurm will create an output file named jupyter-server_12345678.out in your working directory. Check its contents for connection instructions:
cat jupyter-server_12345678.out

1. SSH TUNNEL COMMAND:
    ssh -N -L UWNetID@klone.hyak.uw.edu 8787:n3286.hyak.local:8787

2. JUPYTER LAB URL:
   http://localhost:32843/lab?token=81b3a8c8aadfbc666669a9f3

3. AUTHENTICATION TOKEN:
   81b3a8c8aadfbc666669a9f3

4. TO TERMINATE THIS JOB:
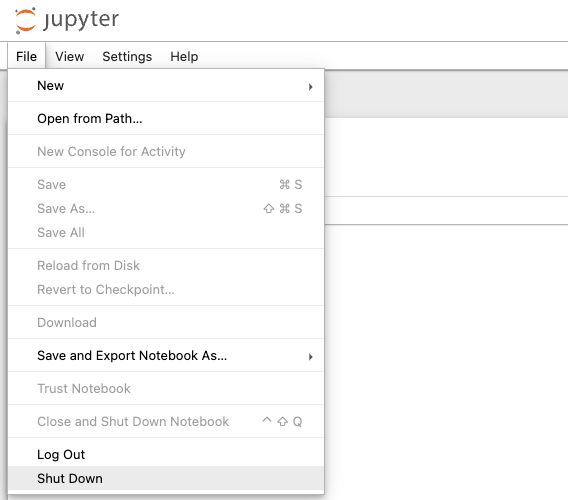
   a. Close Jupyter Lab (File → Shut Down)
   b. Run: scancel -f 25372780
Step 3: Start Port Forwarding
This next section is done on your local computer not on the cluster.
In a new terminal or command prompt on your laptop, copy and paste the SSH command from the Slurm output:
ssh UWNetID@klone.hyak.uw.edu -L 8787:n3286.hyak.local:8787
... provide UWNetID password
... Duo 2 Factor Authentication
The login will appear to hang, but your connection is now open. If you are disconnected and reconnect, you can resume your Jupyter session.
Do not use the Jupyter token to open the SSH tunnel. After your SSH command, your UWNetID password is required. Multiple failed login attempts will result in an IP ban.
Next, open a new browser window to the Jupyter Lab URL provided in the output file. This will automatically authenticate your session with the generated token.
Step 4: End your Session
If you did not adjust the --time directive in jupyter-server.job, your session will end after the specified time.
Preferably, you can end your session manually:
- Exit the Jupyter Session ("power" button in the top right corner of the Jupyter window)
- Go back to
kloneand use thescancelcommand with your job ID:
scancel -f 12345678
Regular use of this method
Once you are satisfied with the job settings and configuration of your Jupyter session, you can reuse this method every time you want to use Jupyter by starting at Step 2: Start the Jupyter Server.
This method provides automation of the setup process but does not offer additional stability or persistence compared to the manual setup described earlier. For the most reliable long-running sessions, consider using Open OnDemand.
If you have trouble with this method, please report errors in an email to help@uw.edu with Hyak in the message.
Manual Jupyter Setup with Miniconda
These instructions cover jupyter-notebook 7.1.2, though should be easily adaptable for both newer versions and jupyter-lab.
Pre-requisites
This tutorial assumes you have already completed the set up of Miniconda covered here. Throughout this exercise, it might be helpful to refer to those instructions if you get stuck.
The examples below use my UWNetID (finchkn) and a compute node that was available during the development of this documentation (n3097); you will have to replace finchkn with your UWNetID and probably n3097 with a different compute node name when required.
Step 1: Set Up
Before beginning this exercise, please select a random number between 4096 and 16384 for your Jupyter-Notebook server to start on. It is important that this number is unique and does not conflict with either another user or an existing service on your machine. From this point out, we will use 9195 as an example.
Start an interactive job on a compute node with salloc.
[finchkn@klone-login03 ~]$ salloc -A uwit -p ckpt --time=4:00:00 --mem=10G -c 4
    salloc: Pending job allocation 1546486
    salloc: job 1546486 queued and waiting for resources
    salloc: job 1546486 has been allocated resources
    salloc: Granted job allocation 1546486
    salloc: Waiting for resource configuration
    salloc: Nodes n3097 are ready for job
[finchkn@n3097 ~]$
Step 2: Install and Configure Jupyter Notebook
Create a conda environment and install required packages.
[finchkn@n3097 ~]$ conda create -n jupyter-notebook
[finchkn@n3097 ~]$ conda activate jupyter-notebook
(jupyter-notebook)[finchkn@n3097 ~]$ conda install -c conda-forge notebook
Set up a password for your Jupyter Notebook Session. This will remain your password every time you log in - Remember it.
(jupyter-notebook)[finchkn@n3097 ~]$ jupyter-notebook --generate-config
(jupyter-notebook)[finchkn@n3097 ~]$ jupyter-notebook password
    Enter password:
    Verify password:
[JupyterNotebookApp] Wrote hashed password to ~/.jupyter/jupyter_server_config.json
Step 3: Start Jupyter Notebook Sessions
Remember, we chose 9195 as our random number for this exercise. You can choose any number between 4096 and 16384 for your connection, and replace 9195 with that number in the following examples.
Start jupyter notebook.
(jupyter-notebook)[finchkn@n3097 ~]$ jupyter notebook --port 9195 --ip 0.0.0.0
    [I 2024-04-01 16:05:45.434 ServerApp] Extension package jupyter_lsp took 0.9552s to import
    ...
    [I 2024-04-01 16:05:58.515 ServerApp] Jupyter Server 2.13.0 is running at:
    [I 2024-04-01 16:05:58.515 ServerApp] http://n3097:9195/tree
    [I 2024-04-01 16:05:58.515 ServerApp]     http://127.0.0.1:9195/tree
    [I 2024-04-01 16:05:58.516 ServerApp] Use Control-C to stop this server and shut down all kernels (twice to skip confirmation).
    ...
Keep this window open. Messages about your session will be printed there.
Now open a new Terminal/Windows Powershell/PuTTy window and start an ssh tunnel from your local computer to the jupyter notebook session that you initiated on the klone compute node.
kristenfinch@Kristens-MBP-3 ~ % ssh -L 9195:n3097:9195 finchkn@klone.hyak.uw.edu
    (finchkn@klone.hyak.uw.edu) Password:
    (finchkn@klone.hyak.uw.edu) Duo two-factor login for finchkn

    Enter a passcode or select one of the following options:

    1. Duo Push to XXX-XXX-XXXX
    2. Phone call to XXX-XXX-XXXX

    Passcode or option (1-2): 1
    Success. Logging you in...
     _    _                    _                 _
    | | _| | ___  _ __   ___  | |__  _   _  __ _| | __
    | |/ / |/ _ \| '_ \ / _ \ | '_ \| | | |/ _` | |/ /
    |   <| | (_) | | | |  __/ | | | | |_| | (_| |   <
    |_|\_\_|\___/|_| |_|\___| |_| |_|\__, |\__,_|_|\_\
                                     |___/
Next direct your browser to http://localhost:9195. You will be prompted for the password you set with jupyter-notebook a few steps ago.

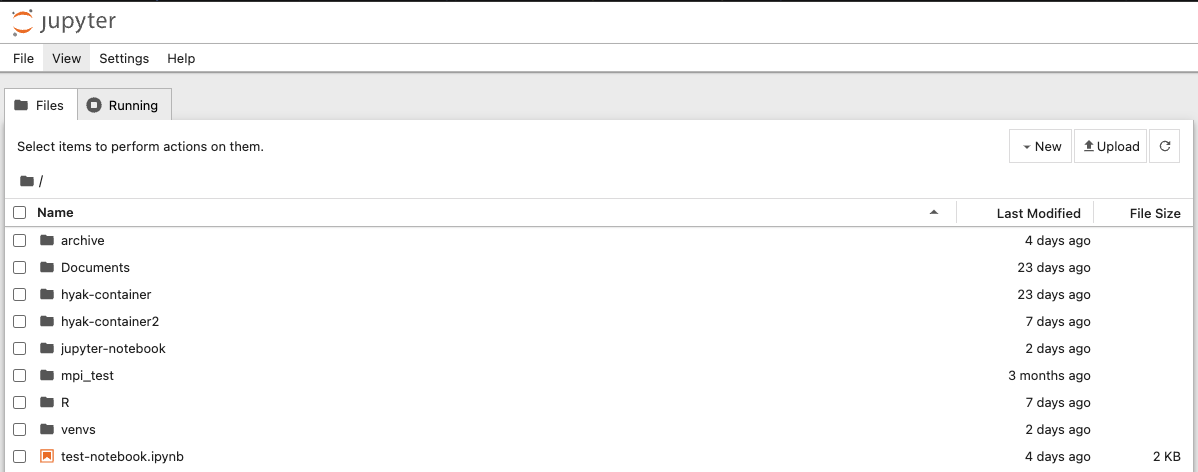
The browser will open the Jupyter Notebook Session and you will see contents of the directory on klone.

Your token for this session will also appear in the terminal window connected to the compute node.
[I 2024-04-01 16:13:54.521 ServerApp] User 99999somee92ftoken1bfhere9999999 logged in.
[I 2024-04-01 16:13:54.522 ServerApp] 302 POST /login?next=%2Ftree%3F (99999somee92ftoken1bfhere9999999) 462.64ms
While the connection is open. Another option is to direct your browser to http://localhost:9195/?token=99999somee92ftoken1bfhere9999999
Step 4: End your session
End your session from the browser with the File Menu and "Shut Down" or "Log Out."

Then go to your terminal window to the compute node and use Control + C to end the session there.
$ ^C
    [I 2024-04-01 16:54:11.419 ServerApp] interrupted
    [I 2024-04-01 16:54:11.419 ServerApp] Serving notebooks from local directory: /dir/
        0 active kernels
        Jupyter Server 2.13.0 is running at:
        http://n3097:9195/tree
        http://127.0.0.1:9195/tree
    Shut down this Jupyter server (y/[n])? y
    [C 2024-04-01 16:54:14.872 ServerApp] Shutdown confirmed
    [I 2024-04-01 16:54:14.875 ServerApp] Shutting down 5 extensions
(jupyter-notebook) [finchkn@n3097 ~]$
End the interactive job.
(jupyter-notebook) [finchkn@n3097 ~]$ exit
salloc: Relinquishing job allocation 1546486
salloc: Job allocation 1546486 has been revoked.